In the past year, WebSoundArt has published 5 tutorials for programming web audio, looking at advanced tools such as tone.js, Node for Max, RNBO, React, and the Web Audio API itself. However, if you are looking for an ultra-quick, minimal barriers-to-entry entrance into programming audio on the web, this tutorial here is for you. We are going to explore p5.sound, a library of audio tools inside of p5.js, a larger, popular library for creative coding in JavaScript.
Programming audio with p5 is a great playground for creativity. It was created by and for artists, and once you become familiar with p5.sound, that knowledge will transfer over to the rest of the p5.js library, which is great for coding visuals and interactive elements.
Whether you are looking to quickly prototype a musical idea, add music to an existing website or web project, or even looking to learn JavaScript from scratch, p5.sound is a great starting place for artists with little to no background in programming.
Getting Started
In general, coding for the web involves three components:
- A text editor (to write code)
- A web browser (to run code)
- Knowledge of a coding language (e.g. JavaScript)
There are many different editors, browsers, and languages that can be used for making web music. For our purposes (i.e. ultra-quick, easy to learn), we are going to use the p5 Web Editor. This is a all-in-one tool for writing and running JavaScript preloaded with the p5.js library. Basically, you can focus completely on coding your artistic ideas, and not worry about all the boiler plate of setting up an environment, importing libraries, and other things you can focus on later.
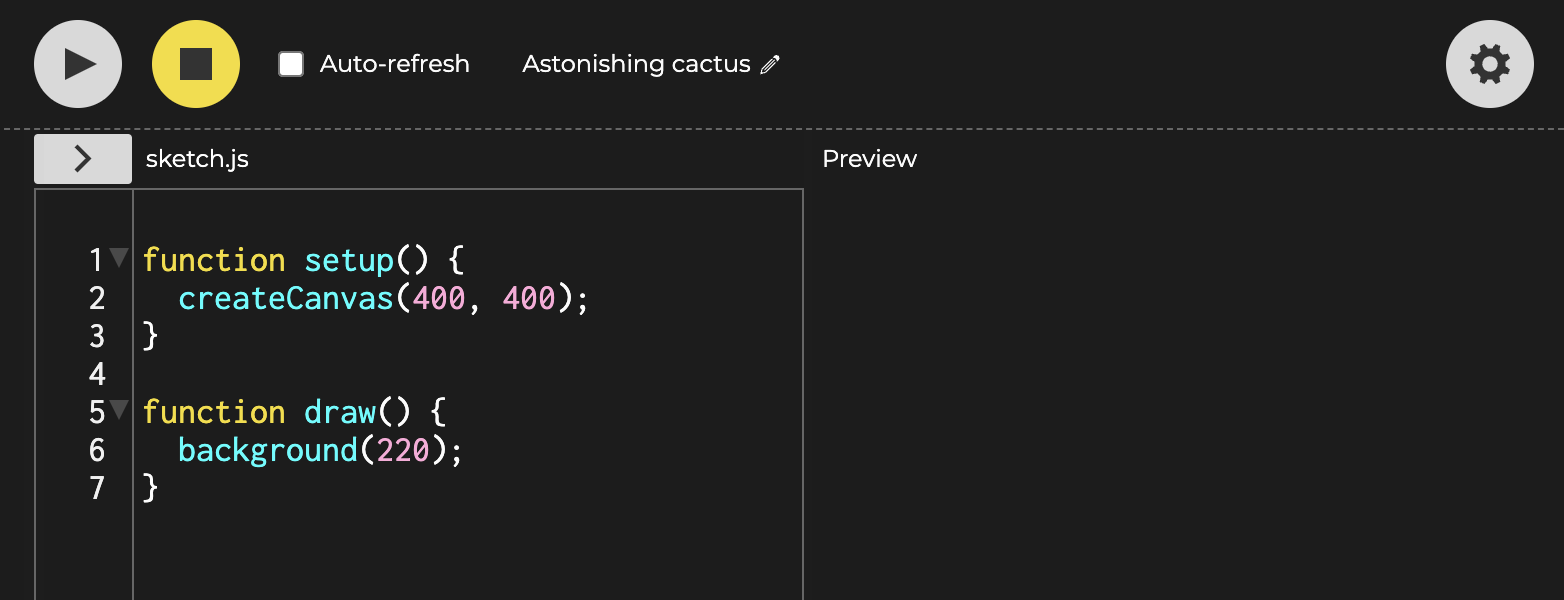 Write your code on the left, watch it run on the right.
Noise, Sound File, and Synthesizer Basics
Here are three examples of programming sound, followed by a brief explanation of how p5.js operates as a library:
Noise Generator
Noise is the most basic sound we can program.
    //declare a variable called 'myNoise'
    let myNoise;
    function setup() {
        createCanvas(400, 400);
        //assign myNoise to a noise generator
        myNoise = new p5.Noise();
        //adjust the volume
        myNoise.amp(0.3);
        //start the noise!
        myNoise.start();
    }
    function draw() {
        background(220);
    }
Loading and Playing a Sound File
Sound files are a similar level of complexity:
    //declare a variable called 'mySound'
    let mySound;

    //the function preload() runs before any other part of the sketch.
    function preload() {
        soundFormats('mp3', 'ogg');
        mySound = loadSound('path/to/sound/file');
    }

    //creates a simple visual cue for playing the sound file
    function setup() {
        let cnv = createCanvas(100, 100);
        cnv.mousePressed(canvasPressed);
        background(220);
        text('tap here to play', 10, 20);
    }

    //sound file will play when the canvas is pressed (clicked)
    function canvasPressed() {
        mySound.play();
    }
Be sure to write into the loadSound()
function an actual filepath name, and to upload into the web editor a sound you want to use. You can
upload files via the left hand menu, accessible in the upper left corner of the text editor. Or,
check out this sketch of loading a
kick drum sample.
Synthesizers and Oscillators
Finally, we can also create synthesizers by using the Oscillator class. This is more complex, and a basic understanding of synthesizers is helpful to have.
//declaring multiple variables for our synthesizer
let osc, playing, freq, amp;

function setup() {
  let cnv = createCanvas(100, 100);
  cnv.mousePressed(playOscillator);
  osc = new p5.Oscillator('sine');
}

//This code programs how our  mouse will control the frequency and volume of the oscillator
function draw() {
  background(220)
  freq = constrain(map(mouseX, 0, width, 100, 500), 100, 500);
  amp = constrain(map(mouseY, height, 0, 0, 1), 0, 1);

  text('tap to play', 20, 20);
  text('freq: ' + freq, 20, 40);
  text('amp: ' + amp, 20, 60);

  if (playing) {
    // smooth the transitions by 0.1 seconds
    osc.freq(freq, 0.1);
    osc.amp(amp, 0.1);
  }
}

//makes the osc start. This function is triggered in setup()
function playOscillator() {
  osc.start();
  playing = true;
}

function mouseReleased() {
  // ramp amplitude to 0 over 0.5 seconds
  osc.amp(0, 0.5);
  playing = false;
}
We can better understand how all this code works when we explore how p5.js is structured as a coding library.
Interlude: How p5 works
To those for whom JavaScript is a new language, here is a short paragraph about how code in p5 is structured.
Any event or functionality in p5 is likely written inside of some sort of function. The most basic
functions in p5 are built to run in particular circumstances. For example, the most common
function,setup(), will run once at the
initial start up of the sketch. The other most common function,draw(), will run continuously, over and over
again while the sketch is running. In the example of our p5.Oscillator above:
function setup() {
  let cnv = createCanvas(100, 100);
  cnv.mousePressed(playOscillator);
  osc = new p5.Oscillator('sine');
}
The creation of a new p5.Oscillator needs to only happen once at the beginning of
the sketch. It is code that “sets up” the synthesizer. On the other hand, the user interface for
controlling frequency and amplitude is placed in draw():
function draw() {
  background(220)
  freq = constrain(map(mouseX, 0, width, 100, 500), 100, 500);
  amp = constrain(map(mouseY, height, 0, 0, 1), 0, 1);
}
Our cursor’s X and Y position controls the frequency and amplitude of the oscillator. In order for these parameters to update in realtime with the movement of our mouse, the code written above executes many times as long as the sketch is running.
Each of these methods for creating sound have their own methods and parameters. Visit the p5.js reference to see in depth how each of these sound-making classes operate: (Reference for Noise, Sound Files, and Oscillator (Synthesizer).
In the next section, we will stick with sound files, and explore some higher level controls for creating melodies, rhythms, phrases, and musical structure.
Use p5.Phrase and p5.Part for Higher Level Control
In our code snippets above, we have basic tools for creating a artistic work. However, there are additional, higher level tools in p5 that allow us to control not just individual sound generators, but also larger phrases and sections of music.
For example, if I wanted to create a simple, repetitive rhythm from my sound file. A very basic
approach would be to use the mySound.play() method over and over again,
triggered at various times. In practice however, this would be tedious and unnecessarily repetitive
to code. Instead, we can use the classes p5.Part and p5.Phrase which are designed to help us
build larger musical structures.
Here is an example of using p5.Part and p5.Phrase to create a rhythmic loop of a kick drum sample.
Take note of the array kPat = [1, 0, 0, 0]. In this array, a 1
triggers kick.play(time), and plays the
kick drum sample. A 0 will do nothing. The p5.Phrase kPhrase is moving through the array at a
regular tempo. Each element in the array can be thought of as a 1/16th note.
Try this example in the p5 Web Editor.
let kick; // variable assigned to sound file
let kPhrase; // a rhythmic phrase
let seq; // a Part - Controlling when phrases are played
let kPat; // an array - a rhythm to load into the phrase

let cnv; // variable assigned to play button

function setup() {

  //load an audio file
  kick = loadSound('assets/kick.wav');

  //define a rhythm for the phrase.
  kPat = [1, 0, 0, 0];

  //define the phrase - phrase name, phrase function, phrase rhythm
  kPhrase = new p5.Phrase('kickName', function(time){kick.play(time);},kPat);

  //Define a p5.Part which controls which P5.phrases are played
  seq = new p5.Part();
  seq.addPhrase(kPhrase);

  //creating a play button / UI
  cnv = createCanvas(350, 60);
  cnv.mousePressed(canvasClicked);
}

function draw() {
  //Further visuals for the play button
  background(120);
  fill(255);
  text("Tap here to play/stop", 30, 40);
  textSize(30);
}

//defining the functionality of the play button
function canvasClicked() {
  if(!seq.isPlaying){
         seq.metro.metroTicks = 0;
    seq.loop();
  } else {
  seq.stop();
  }
}
In this snippet, seq is a p5.Part, and
kPhrase is a p5.Phrase. You can think of
our p5.Phrase seq as being like an
ensemble, while our p5.Phrase kPhrase is a
musician in the ensemble, and the array kPat is a rhythm that the musician plays.
With this in mind, lets add two more p5.Phrases, cPhrase and hPhrase, and give them their own arrays of
rhythm (i.e. cPat and hPat).
Try this example in the p5 Web Editor.
let kick, clap, hat; // variables assigned to sound files
let kPhrase, cPhrase, hPhrase; // phrases for each sound
let seq; // a Part - Controlling when phrases are played
let kPat, cPat, hPat; // arrays of patterns

let cnv; // variable assigned to play button

function setup() {
  //load audio files
  kick = loadSound('assets/kick.wav');
  clap = loadSound('assets/clap.wav');
  hat = loadSound('assets/hat.wav');

  //defining rhythms
  kPat = [1, 0, 0, 0, 1, 0, 0, 0, 0, 0, 0, 0, 0, 0, 1, 0 ];
  cPat = [0, 0, 0, 0, 0, 0, 0, 0, 1, 0, 0, 0, 0, 0, 0, 0 ];
  hPat = [1, 0, 1, 0, 1, 0, 1, 0, 1, 0, 1, 1, 1, 0, 1, 0 ];

  //define the phrases
  kPhrase = new p5.Phrase('kickName', function(time){kick.play(time);},kPat);
  cPhrase = new p5.Phrase('clapName', function(time){clap.play(time);},cPat);
  hPhrase = new p5.Phrase('hatName', function(time){hat.play(time);},hPat);

  //Define a p5.Part which controls which P5.phrases are played
  seq = new p5.Part();
  seq.addPhrase(kPhrase);
  seq.addPhrase(cPhrase);
  seq.addPhrase(hPhrase);

  //creating a play button / UI
  cnv = createCanvas(350, 60);
  cnv.mousePressed(canvasClicked);

}

function draw() {
  //Further visuals for the play button
  background(120);
  fill(255);
  text("Tap here to play/stop", 30, 40);
  textSize(30);
}

//defining the functionality of the play button
function canvasClicked() {
  if(!seq.isPlaying){
         seq.metro.metroTicks = 0;
    seq.loop();
  } else {
  seq.stop();
  }
}
Keeping Code DRY
A common principle for writing code is DRY: Don’t Repeat Yourself. When coding, you may find that you are writing the same lines over and over again. Take this code from our previous example:
//(Inside of function setup())
//creating phrases for kick, clap, and hat
kPhrase = new p5.Phrase('kickName', function(time){kick.play(time);},kPat);
cPhrase = new p5.Phrase('clapName', function(time){clap.play(time);},cPat);
hPhrase = new p5.Phrase('hatName', function(time){hat.play(time);},hPat);
When this occurs, there may be the opportunity to rewrite it in a way that will make it more understandable and easier to edit in the future. Here is that same code, now refactored as a separate function.
//(Inside of setup())
//define the phrases - see function called createPhrase()
kPhrase = createPhrase('kickName', kick, kPat);
cPhrase = createPhrase('clapName', clap, cPat);
hPhrase = createPhrase('hatName', hat, hPat);

//
//
//

//later, outside of setup()
function createPhrase(name, sound, pat){
    return new p5.Phrase('name', function(time){sound.play(time);},pat);
}
Try this rewritten example.
In this example, the redundant aspects of the first code snippet have been bundled into a separate function at the bottom of the sketch (i.e. writing the callback function that plays the sound file). Not only does this make the code easier to read for anyone unfamiliar with the sketch, it also also means that creating additional phrases will require less lines of code.
What p5.Part and p5.Phrase Offer Us
Writing with the DRY principle changes how we approach coding. It encourages us to think of our sketch in a modular way, rather than a top-down way. Each component of a sketch, phrase creation, user interface design, rhythm selection, and sound generation can get encapsulated into their own sections in our code. This becomes especially useful when our sketches become more complex.
To demonstrate this, here are two more examples of our drum machine sketch. The first is a set of menus that allow us to choose which rhythms are assigned to our kick drum, clap, and hi-hat.
Modular Rhythms in our Drum Machine
Try this example in the p5 Web Editor.
let kick, clap, hat; // variables assigned to sound files
let kPhrase, cPhrase, hPhrase; // phrases for each sound
let seq; // a Part - Controlling when phrases are played
let kPat, cPat, hPat;
let Pat1, Pat2, Pat3, tacet; // arrays of patterns
let kMenu, cMenu, hMenu; //select patterns for each phrase
let cnv; // variable assigned to play button
function setup() {
//load audio files
kick = loadSound('assets/kick.wav');
clap = loadSound('assets/clap.wav');
hat = loadSound('assets/hat.wav');
//defining rhythms
Pat1 = [1, 0, 0, 0, 1, 0, 0, 0, 1, 0, 0, 1, 0, 0, 1, 0 ];
Pat2 = [0, 0, 0, 0, 1, 0, 0, 0, 0, 0, 0, 0, 1, 0, 1 ];
Pat3 = [1, 0, 0, 1, 0, 0, 1, 0, 1, 0 ];
tacet = [0, 0, 0, 0 ];
//assigning rhythms to phrases
kPat = Pat1;
cPat = Pat2;
hPat = Pat3;
// //define the phrases - see function called createPhrase()
kPhrase = createPhrase('kickRef', kick, kPat);
cPhrase = createPhrase('clapRef', clap, cPat);
hPhrase = createPhrase('hatRef', hat, hPat);
//Define a p5.Part which controls which P5.phrases are played
seq = new p5.Part();
seq.addPhrase(kPhrase);
seq.addPhrase(cPhrase);
seq.addPhrase(hPhrase);
//creating a play button / UI
cnv = createCanvas(350, 120);
cnv.mousePressed(canvasClicked);
// Creating menus for kick, clap, and hat patterns
kMenu = new Menu(40, kPat, kick, {Pat1, Pat2, Pat3, tacet}, 'Pat1', 'kickRef', kPhrase); // Kick
cMenu = new Menu(120, cPat, clap, {Pat1, Pat2, Pat3, tacet}, 'Pat2', 'clapRef', cPhrase); // Clap
hMenu = new Menu(200, hPat, hat, {Pat1, Pat2, Pat3, tacet}, 'Pat3', 'hatRef', hPhrase); // Hat
}
function draw() {
//Further visuals for the play button
background(120);
fill(255);
textSize(30);
text("Tap here to play/stop", 30, 40);
textSize(15);
text("Kick Clap Hat", 50, 60);
}
function createPhrase(name, sound, pat) {
return new p5.Phrase(name, function(time){sound.play(time);},pat);
}
//defining the functionality of the play button
function canvasClicked() {
if(!seq.isPlaying){
seq.metro.metroTicks = 0;
seq.loop();
} else {
seq.stop();
}
}
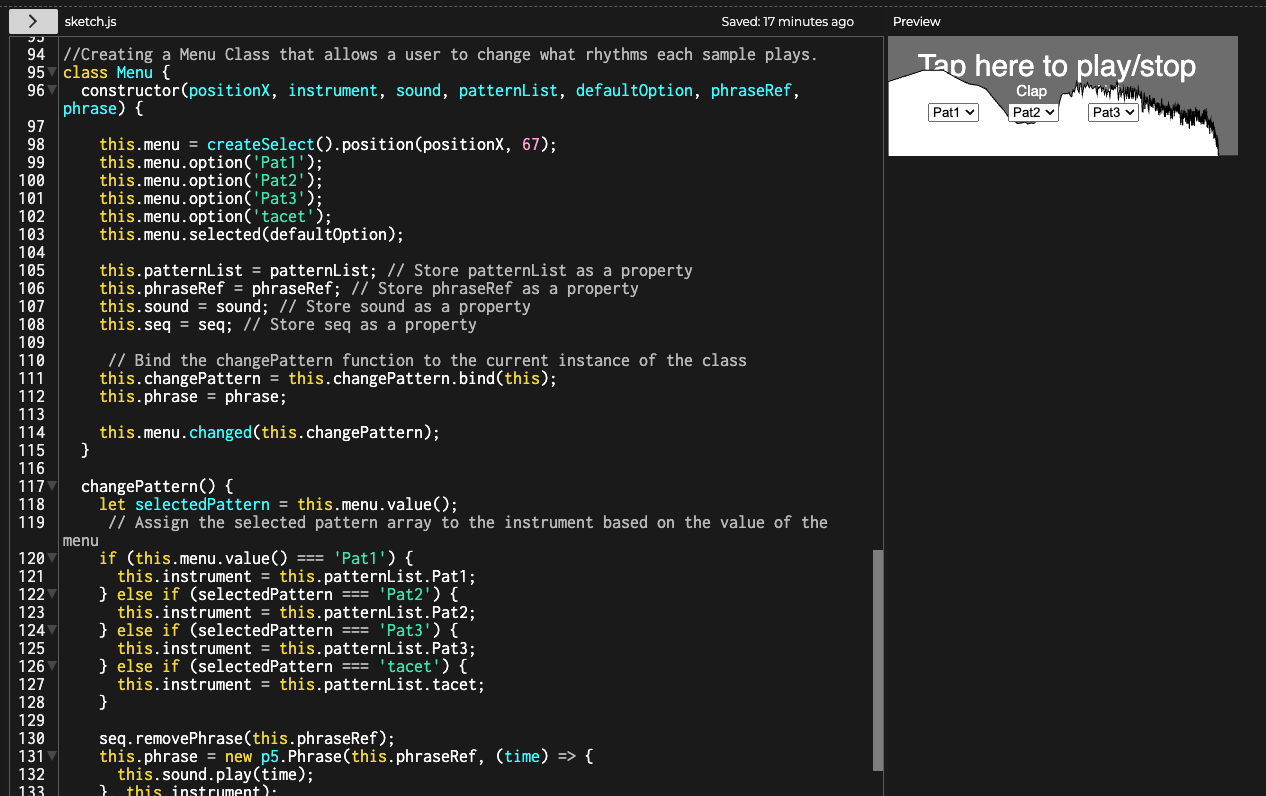
//Creating a Menu Class that allows a user to change what rhythms each sample plays.
class Menu {
constructor(positionX, instrument, sound, patternList, defaultOption, phraseRef, phrase) {
this.menu = createSelect().position(positionX, 67);
this.menu.option('Pat1');
this.menu.option('Pat2');
this.menu.option('Pat3');
this.menu.option('tacet');
this.menu.selected(defaultOption);
this.patternList = patternList; // Store patternList as a property
this.phraseRef = phraseRef; // Store phraseRef as a property
this.sound = sound; // Store sound as a property
this.seq = seq; // Store seq as a property
// Bind the changePattern function to the current instance of the class
this.changePattern = this.changePattern.bind(this);
this.phrase = phrase;
this.menu.changed(this.changePattern);
}
changePattern() {
let selectedPattern = this.menu.value();
// Assign the selected pattern array to the instrument based on the value of the menu
if (this.menu.value() === 'Pat1') {
this.instrument = this.patternList.Pat1;
} else if (selectedPattern === 'Pat2') {
this.instrument = this.patternList.Pat2;
} else if (selectedPattern === 'Pat3') {
this.instrument = this.patternList.Pat3;
} else if (selectedPattern === 'tacet') {
this.instrument = this.patternList.tacet;
}
seq.removePhrase(this.phraseRef);
this.phrase = new p5.Phrase(this.phraseRef, (time) => {
this.sound.play(time);
}, this.instrument);
seq.addPhrase(this.phrase);
}
}
Here, each of our three samples have menus where different rhythms can be selected.
Visual Interface
Try this example in the p5 Web Editor.
let kick, clap, hat; // variables assigned to sound files
let kPhrase, cPhrase, hPhrase; // phrases for each sound
let seq; // a Part - Controlling when phrases are played
let kPat, cPat, hPat;
let Pat1, Pat2, Pat3, tacet; // arrays of patterns

let kMenu, cMenu, hMenu; //select patterns for each phrase

let cnv; // variable assigned to play button
let fft; // analysis for visualizer

function setup() {

  //load audio files
  kick = loadSound('assets/kick.wav');
  clap = loadSound('assets/clap.wav');
  hat = loadSound('assets/hat.wav');

  //defining rhythms
  Pat1 = [1, 0, 0, 0, 1, 0, 0, 0, 1, 0, 0, 1, 0, 0, 1, 0 ];
  Pat2 = [0, 0, 0, 0, 1, 0, 0, 0, 0, 0, 0, 0, 1, 0, 1 ];
  Pat3 = [1, 0, 0, 1, 0, 0, 1, 0, 1, 0 ];
  tacet = [0, 0, 0, 0];

  //assigning rhythms to phrases
  kPat = Pat1;
  cPat = Pat2;
  hPat = Pat3;

  // //define the phrases - see function called createPhrase()
  kPhrase = createPhrase('kickRef', kick, kPat);
  cPhrase = createPhrase('clapRef', clap, cPat);
  hPhrase = createPhrase('hatRef', hat, hPat);

  //Define a p5.Part which controls which P5.phrases are played
  seq = new p5.Part();
  seq.addPhrase(kPhrase);
  seq.addPhrase(cPhrase);
  seq.addPhrase(hPhrase);

  //creating a play button / UI
  cnv = createCanvas(350, 120);
  cnv.mousePressed(canvasClicked);

  // Creating menus for kick, clap, and hat patterns
kMenu = new Menu(40, kPat, kick, {Pat1, Pat2, Pat3, tacet}, 'Pat1', 'kickRef', kPhrase); // Kick
cMenu = new Menu(120, cPat, clap, {Pat1, Pat2, Pat3, tacet}, 'Pat2', 'clapRef', cPhrase); // Clap
hMenu = new Menu(200, hPat, hat, {Pat1, Pat2, Pat3, tacet}, 'Pat3', 'hatRef', hPhrase); // Hat

fft = new p5.FFT(); //create FFT analysis of audio, for a visualizer in draw()
}

function draw() {
  //Further visuals for the play button
  background(120);
  fill(255);
  textSize(30);
  text("Tap here to play/stop", 30, 40);

  textSize(15);
  text("Kick            Clap            Hat", 50, 60);

  //Audio Visualizer

  let spectrum = fft.analyze();

  beginShape();

  vertex(0,height);

  for (let i = 0; i < spectrum.length; i++) {
    vertex(map(log(i), 0, log(spectrum.length), 0, width), map(spectrum[i],0, 255, height, 0));
  }

  vertex(width,height);  // HERE
  endShape();
}

function createPhrase(name, sound, pat) {
   return new p5.Phrase(name, function(time){sound.play(time);},pat);
}

//defining the functionality of the play button
function canvasClicked() {
  if(!seq.isPlaying){
         seq.metro.metroTicks = 0;
    seq.loop();
  } else {
  seq.stop();
  }
}

//Creating a Menu Class that allows a user to change what rhythms each sample plays.
class Menu {
  constructor(positionX, instrument, sound, patternList, defaultOption, phraseRef, phrase) {

    this.menu = createSelect().position(positionX, 67);
    this.menu.option('Pat1');
    this.menu.option('Pat2');
    this.menu.option('Pat3');
    this.menu.option('tacet');
    this.menu.selected(defaultOption);

    this.patternList = patternList; // Store patternList as a property
    this.phraseRef = phraseRef; // Store phraseRef as a property
    this.sound = sound; // Store sound as a property
    this.seq = seq; // Store seq as a property

     // Bind the changePattern function to the current instance of the class
    this.changePattern = this.changePattern.bind(this);
    this.phrase = phrase;

    this.menu.changed(this.changePattern);
  }

  changePattern() {
    let selectedPattern = this.menu.value();
     // Assign the selected pattern array to the instrument based on the value of the menu
    if (this.menu.value() === 'Pat1') {
      this.instrument = this.patternList.Pat1;
    } else if (selectedPattern === 'Pat2') {
      this.instrument = this.patternList.Pat2;
    } else if (selectedPattern === 'Pat3') {
      this.instrument = this.patternList.Pat3;
    } else if (selectedPattern === 'tacet') {
      this.instrument = this.patternList.tacet;
    }

    seq.removePhrase(this.phraseRef);
    this.phrase = new p5.Phrase(this.phraseRef, (time) => {
      this.sound.play(time);
    }, this.instrument);
    seq.addPhrase(this.phrase);
  }
}
In the bottom of draw(), a shape is being
drawn whose contours are controlled by an fft analysis of the audio.
This simple visualizer is only the surface of a deep world of visual tools in p5. I hope this crash course of p5.sound gives you inspiration and code to play with, that can kick start your own journey through creative coding.
Acknowledgements
This tutorial was adapted from a workshop I taught for my music festival Browser Sound called JavaScript for Sound Artists. The drum machine and FFT visualization created in this tutorial is inspired by similar ones in Dan Tramte’s tutorial Browser Noise.
To Top ↑