In the last tutorial, we covered how to get started with web development in a broad sense, finishing
with a
custom audio player that played the sound file in a hidden <audio> element, which touched on all
three
languages – HTML, CSS, and JS.
In this tutorial, we’ll explore Tone.js, a Javascript library that lets us do fairly expressive interactive audio in the browser. Tone.js is built on top of the Web Audio API, which is a set of Javascript functions for enabling programmable audio functionality in the browser itself.
While we can interact with the Web Audio API directly, it introduces a few more difficulties – the functions are longer, they don’t handle the quirks and differences between browsers, and coding with it is a little less expressive. On top of pre-built effects, synthesis functions, and utilities, Tone.js also includes score structuring functions for making effects and patterns. We won’t get into those today; this tutorial is intended to give you a handful of easy ways to start exploring Tone.js.
Setup
With that said, we’ll be loading Tone.js from an external source, and making our code in a
separate
script file. We’ll load them both in <script>
tags, with the library coming before our code.
(Wondering why we don’t throw everything in the same file? The answer to that is complicated, and will change as you get better at Javascript! But for a simple answer, try looking at the minified version of Tone.js we’ll be loading, and let me know if you want to scroll through all that mess just to get to your code at the bottom.)
Make a wsa_tutorial_2 folder, and open it
in VS
Code as we did in the first tutorial. Make an index.html file and a scripts.js file, and include the code below
in each,
respectively.
              <!DOCTYPE html>
<html>
  <head>
    <title>Hello world!</title>
  </head>
  <body></body>
  <script src="https://unpkg.com/tone@14.7.77/build/Tone.js" type="text/javascript"></script>
  <script src="/scripts.js" type="text/javascript"></script>
</html>
console.log("Hello world!");
As before, make sure “Hello world!” pops up in the console. You should also see one or more lines from Tone.js, in the very least a line that looks like this, with the version number: ` * Tone.js v14.7.77 * `
If you see more than that, well! Let’s get started.
Enabling audio
If you’ve been on the internet for awhile, you remember that browsers used to let a webpage autoplay audio when it loaded. This was expected practice for 1990’s personal profile pages, but enough sites used it annoyingly or maliciously that all browsers have implemented some kind of autoplay policy. This means that we cannot do anything that plays sound, or accesses the user’s mic in the Web Audio API without explicit consent.
There are two tiers to this. To just play audio, we need to start our audio device (called a “destination” in the WAAPI) after some kind of page interaction. Generally this level of “consent” isn’t revealed to the user, it’s simply implied through actively clicking something on the page. To access user media devices, like the mic or camera, that requires separate permission. You’ve probably seen this before if you’ve used a web-based video conferencing site, such as Google Meet or Whereby; your browser will show a popup asking you to approve the current website’s use of your mic or camera.
Let’s get audio going first, and then we’ll try accessing the mic. First, add two buttons to the
<body> of index.html:
              <button class="startAudio">Start Audio</button>
<button class="playNote">Play Note</button>
And then, some JS to ask Tone.js to start audio on pressing the first button:
              const start = document.querySelector(".startAudio");
const play = document.querySelector(".playNote");

start.addEventListener("click", async function() {
  await Tone.start();
  console.log("audio started!");
});
Tone is an object similar to console; the object contains all the
functions we want
for making sound, and we access them all through the Tone object. In this case, start() is what starts the audio device.
I’ll show you
many more functions of Tone, but if you
want to see
everything it can do, take a look at its
documentation after you finish the tutorial.
await is a Javascript keyword that
indicates that
the function is asynchronous, meaning it will make a request that fires immediately but takes an
unknown
amount of time to complete, and that we want the rest of the function to wait until it’s finished.
If we
didn’t use await and had more
audio-related code in
our event listener, it might work or fail seemingly without reason, depending on how long it takes
to
initialize our audio destination. async is
its
partner: awaits will only work if they’re
inside an
async function. These are based on Promises;
we’ll see another version of handling Promises when we get to the user’s mic.
Reload the page and check the console. When you click the “Start Audio” button, you should see audio start, and not much more. So let’s make some sound!
Basic synthesis
Add this to your JS file:
              start.addEventListener("click", async function() {
  // ... earlier code ...
});

// hey Tone, can you make me a Synth and
// send the sound out to my speakers?
const synth = new Tone.Synth().toDestination();

play.addEventListener("click", function() {
  // hey synth, can you play a C4 for an 8th note?
  synth.triggerAttackRelease("C4", "8n");
});
Reload, press Start Audio, and then press Play Note. It should… play a note! If you’re used to making beeps and boops with computers, you’ve probably guessed that this is a sine wave sounding at middle C. Here’s some quick explanations of what you’re seeing:
Synth()is the constructor for a class, meaning it makes a brand new object that is of typeSynth. Similar to how Tone is an object that has a ton of functions,Synthalso has a lot of functionality. When we construct an object, we save it in a variable so we can use it later. Here’sSynth’s documentation page.- One of those
Synthfunctions istriggerAttackRelease()! As you can tell, this plays a note for a set duration and then stops. Here’s the documentation entry fortriggerAttackRelease– what else can it do that we haven’t tried yet? toDestination()connects ourSynthto the main outputs of your computer. This is generally whatever your computer’s current default output is, whether that’s your speakers, headphones, interface.
Here are some things to try:
Experiments
Frequency: Similarly, we can change the pitch we hear, and there’s a few ways to specify frequency. Try doing a different note (like “A6” or “B2”), or a frequency (like 500 or 1400).
Time: Tone has a number of different ways of expressing time, but the two easiest for now are numbers (seconds) and notation. Try replacing “8n” above with a few different values, like 2, “32n”, or 0.75.
Timbre: Tone.js has a battery of basic oscillator types. There are a few different
levels of
“complexity” as far as which Tone objects take which types, but Synth can take all of them. To use them, we
have to
change some settings inside the Synth()
constructor.
This will look a little strange, but try this:
const synth = new Tone.Synth({ oscillator: { type: "fatsquare" } }).toDestination();
Dictionaries within dictionaries! First, reload the page and make sure things sound different, and then try changing “fatsquare” to any of the following:
- “sine”, “square”, “sawtooth”, or “triangle”, either by themselves or with the a number from 1-32 on the end (“sine12”, “square2”, “triangle31”)
- AM versions of the above: “amsine”, “amsquare”, etc., again with the numbers 1-32
- FM versions of the above: “fmsine”, “fmsquare”, etc., again with the numbers 1-32
- “fat” versions of the above: “fatsine”, “fatsquare”, etc
The numbers 1-32 correspond to the number of partials in the sound. Using higher numbers will add more oscillators at frequencies that follow the harmonic series, giving you a more complex sound. “sine1” is the same as “sine”.
Mic access
Once you’ve had your fun with synthesizers, let’s get some user input! Add the code below to scripts.js.
// ... earlier code ...
const meter = new Tone.Meter();
const mic = new Tone.UserMedia().connect(meter).toDestination();
start.addEventListener("click", async function() {
// ... earlier code ...
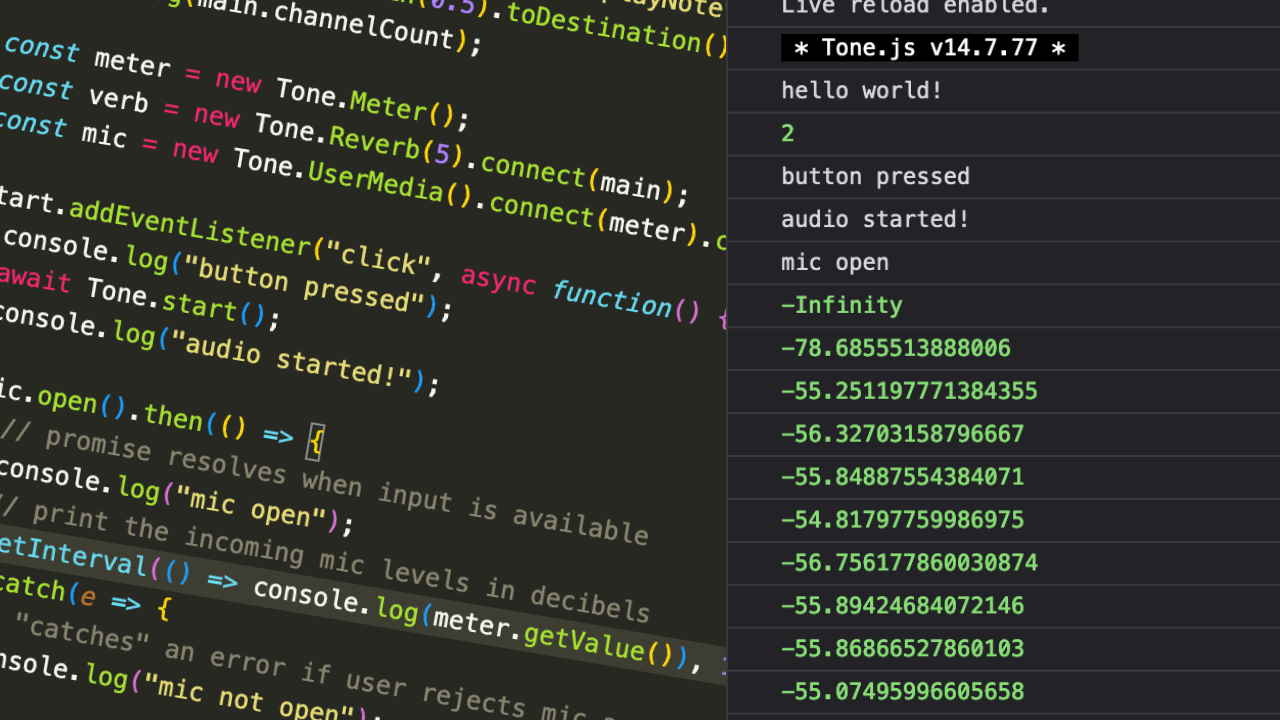
mic.open().then(function() {
// if my Promise resolves true, "then()" I will run this code
console.log("mic open");
// print the incoming mic levels in decibels
setInterval(function() {
console.log(meter.getValue());
}, 100);
}).catch(function(error) {
// if my Promise fails, I'll "catch" any errors
// instead of crashing everything
console.log("mic not open");
});
});
When you run this, you should see the dialog pop up asking for your mic. Try both Allowing it and
Blocking
it, so you see both the code inside of then() and
the code inside of catch(). Blocking
access to the
mic would cause anything relying on the mic after it to fail, so we “catch” the error instead of
letting a
blocked mic wreck havoc on the rest of our Javascript.
You should hear yourself! It might be a bit loud.
Wondering about the meter? If you check the
console, you should see decibel readings every 100 milliseconds. setInterval runs the function passed as its
first
argument at whatever number of milliseconds is given in the second argument.
Loading audio files
We worked with audio files in the last tutorial by using an <audio> element in the page, but we
can also load
audio files with Tone directly. This has a number of advantages – we can use Tone’s score system, we
can load
a large number of files at once, and it’s easier to start and end from specific points in the file.
We’ll talk
more about working with sound files in future tutorials, but here’s the basic setup:
start.addEventListener("click", async function() {
  // ... code above that goes to the mic ...

  const player = new Tone.Player("https://tonejs.github.io/audio/berklee/gong_1.mp3", function() {
    // this function will fire when the audio file is finished loading
    player.start();
  }).toDestination();

});
Experiment
Try redoing our play/pause button from the previous tutorial using Tone.Player (documentation here) instead of the <audio> element. Here are a few hints
for what to
change:
              player.start(); // starts the file
player.stop(); // stops the file

// returns either "started" or "stopped", depending on
// whether the file is currently playing or not
console.log(player.state)
Main channel
If you’ve been following along, you might notice that both our synth and our mic are a bit on the loud side. These two sound sources are going directly to our speakers. You might be wondering – if they’re both going to the same destination, can I turn the level of the destination down?
              // This is what you should currently have at the top of your file
const synth = new Tone.Synth().toDestination();
const mic = new Tone.UserMedia().connect(meter).toDestination();
While you can alter the volume of Tone.Destination directly (toDestination() is just a shorter way of
writing connect(Tone.getDestination())), I
prefer to make a
separate Gain node to act as a master
channel, and
leave the destination alone. Change the above two lines like this:
              const main = new Tone.Gain(0.5).toDestination();
const synth = new Tone.Synth().connect(main);
const mic = new Tone.UserMedia().connect(meter).connect(main);
Unlike other Tone objects, which operate based on decibels (-Infinity to 0), Gain deals with volume in a normalized range
from 0-1.
When we say Gain(0.5), it means we want to
make a
new Gain and immediately set its volume to 50%.
Now, we have a main out, and we can change its volume like this:
              // Gain nodes use normal range. 0 = silence, 1 = full volume
main.gain.value = 0.25;
If you wanted to change an individual track’s volume, you’d do that like this:
              // Most other nodes use decibels, where -100 = silence, 0 = full volume
synth.volume.value = -24;
Exploring effects
Let’s add some audio effects! Try this:
              const verb = new Tone.Reverb(5).connect(main);
const mic = new Tone.UserMedia().connect(meter).connect(verb).connect(main);
connect() is equivalent to running a single
audio
cable from a source to a destination, and it’s always based on the original object doing the connect()ing. We have the following
connections:
synth -> main
mic -> meter
mic -> verb
mic -> main
verb -> main
Talk into your mic: you should hear reverb on your voice. Tone.js doesn’t include a boatload of effects, but it has the essentials. For some more examples, here are the documentation pages on distortion, delay, and vibrato.
Let’s say we made them all:
              // you can check the parameters for each of these individually
// on the documentation pages linked above
const distortion = new Tone.Distortion(0.8);
const delay = new Tone.FeedbackDelay("8n", 0.5);
const vibrato = new Tone.Vibrato(50, 0.5);
const verb = new Tone.Reverb(5);
As opposed to using connect() for
all these
individually (in parallel), we can use chain()
to
connect the output of one to the input of the next (in series).
              const mic = new Tone.UserMedia();
mic.chain(distortion, delay, vibrato, verb, main);
Your turn!
Now that you’ve seen some of the functions in Tone.js, try putting a small web audio project together. Here are some ideas:
- Use the user’s mic signal (which you got from
meter.getValue()) to change the text inside the buttons or the paragraphs. You can also useif/elsestatements to pick some thresholds of loudness – change to one sentence for silence, one for a healthy signal level, and one for a very loud mic. - Thinking back to CSS, you can also add or remove CSS classes from an element with
audioElement.classList.add("my-class")or.remove("my-class"). Make a new, weird class and see if you can add or remove it based on a mic level threshold! - Try making a “keyboard” out of buttons. Depending on the key pressed, change the note played by a synthesizer. If you’d like to experiment with samplers instead, there’s also Tone.Sampler.
- Chain a series of effects and make a simple pedalboard-style effects interface; just
experiment with
buttons that let you turn on/off each effect. Note that Tone’s effects don’t have a
built-in bypass
function, so you’ll need to set an effect’s
wetparameter to 0 instead. (Remember to save it’s previous level, so you can switch it back on!)
I hope you have fun exploring the Web Audio API through Tone.js! Send me a message via @breckelli on Instagram (or find me on the Web Sound Art discord) if you want help troubleshooting.
To Top ↑