Welcome to the first in a series of tutorials on how to make interactive art on the browser on the Web Sound Art blog! This first tutorial focuses on the basic tools and languages used by all web developers, designers, and artists, as this will be a foundation for future tutorials. This tutorial won't be exhaustive, but it will include a lot of resources for further learning.
Part One: Tools
Let's get our tools together. While some of your tools will change as your needs change, this is the bare minimum for the most extensible development experience.
Browser
This may seem a bit obvious, but you'll need a browser! I recommend Firefox or Chrome, though you can use Edge or Safari as well.
Browser developer tools
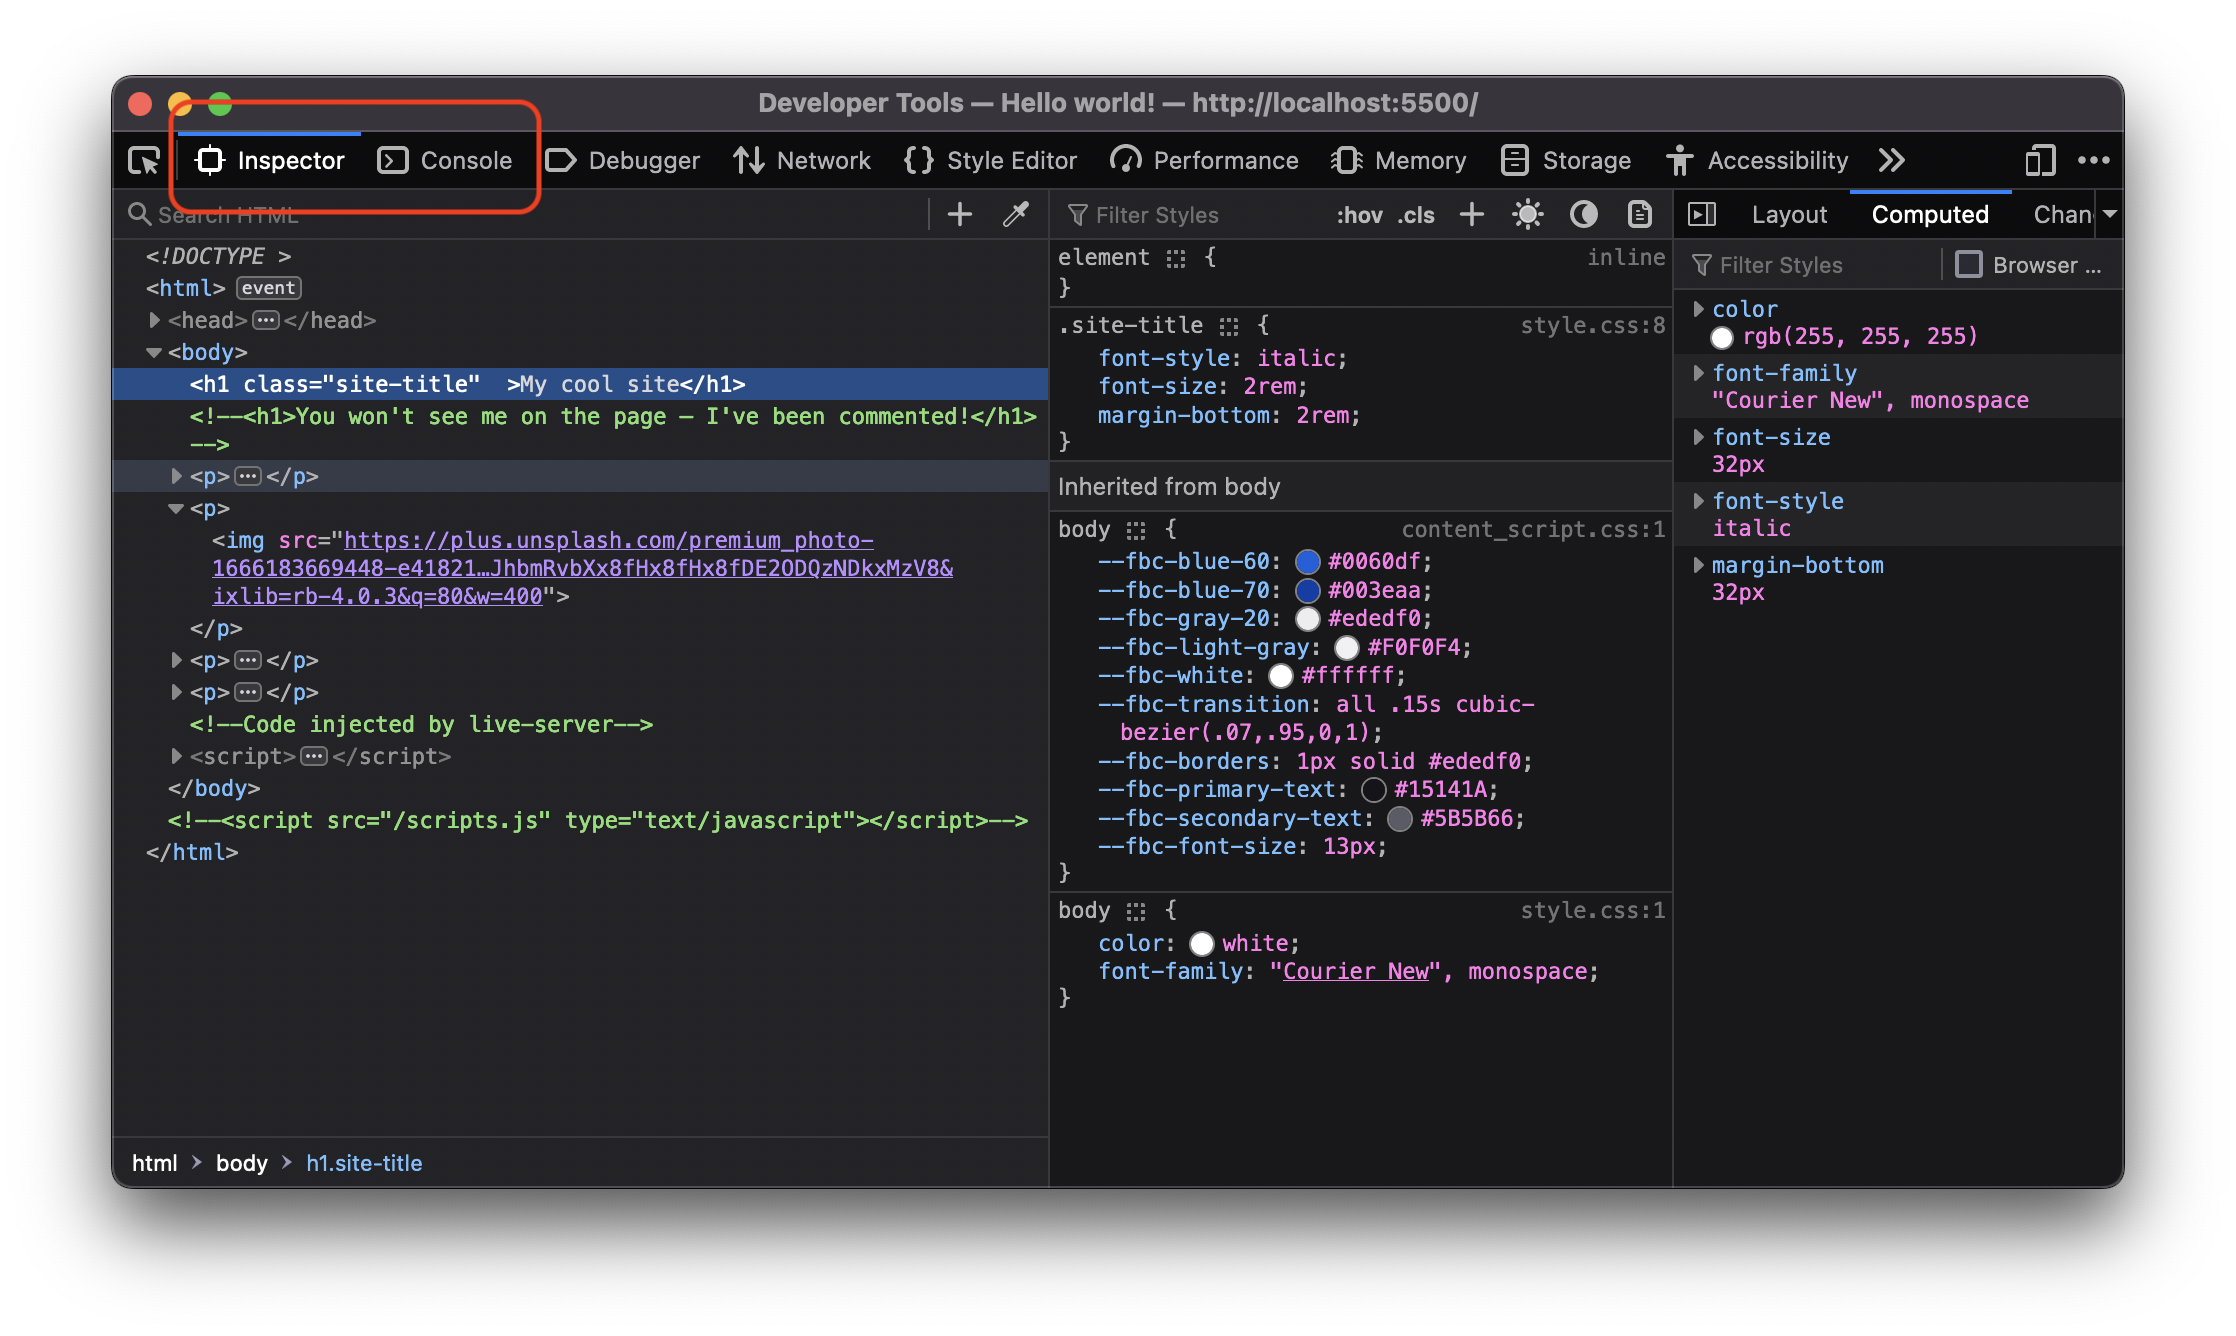
As you make your site, the developer tools in your browser will let you inspect and change its HTML/CSS (Inspector), and view logs and errors in JS (Console). These are extremely helpful for testing. Try right-clicking anywhere on a webpage select either "Inspect" or "Inspect element," and the dev tools will pop up.
These are Firefox's dev tools; depending on your browser, these may look a little different. But
they all still function the same way!
Importantly, any changes you make inside the dev tools will not save to your files! Consider
the
dev tools a space for experimentation and testing only.
In most browsers, these are enabled by default. If you want to use Safari, you have to enable the
Developer Tools by going to Preferences > Advanced, and checking the "Show Develop menu" box.
Code editor
With your browser squared away, now you need a code editor, which will make it easier to edit the
raw text files we'll be working with. For the purposes of this tutorial, my recommendation is VS Code, Sublime Text, or
Notepad++. While they all perform mostly the same
tasks, VS Code
is the only one I'll discuss in this tutorial.
File organization is very important when code is involved. To start with, every project you make
should have its own folder, so make a new folder on your computer and call it
wsa_tutorial_1.
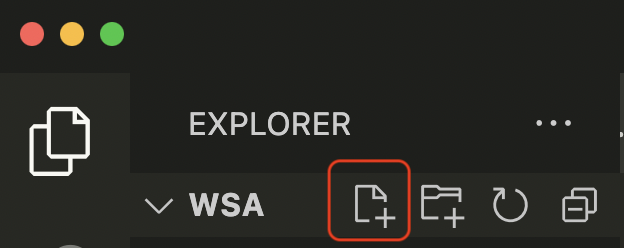
Open up VS Code, and go to File > Open Folder. Find wsa_tutorial_1 and open it. If you
hover your
mouse over the empty block on the left, you should see a few icons appear. Press the leftmost of the
four icons to create a new file, and call it index.html.
Copy the following line into the file, and hit save. (Always save! Your changes will not display otherwise.)
<h1>Hello world!</h1>
Server
When you develop a webpage, it's best to develop it "locally" first, meaning you make it on your computer: it's not accessible to anyone else but you. However, even if we're not sharing the page yet, we still need a server. There are a lot of reasons for this:
- When a server starts, it declares its current folder as a new "root" folder, so any files you
ask for can be relative to the root. Which means, if you start your server inside your
wsa_tutorial_1folder, instead of requesting an image at/Users/myname/Documents/wsa_tutorial_1/dogimage.png, you can instead ask for/dogimage.png.wsa_tutorial_1is now the root. - Eventually, when you publish your site to the web, your page will also be served by... well, another server. It's better to build your site such that it requests resources relative to root early, instead of having to go back at the very end and replacing all your old links.
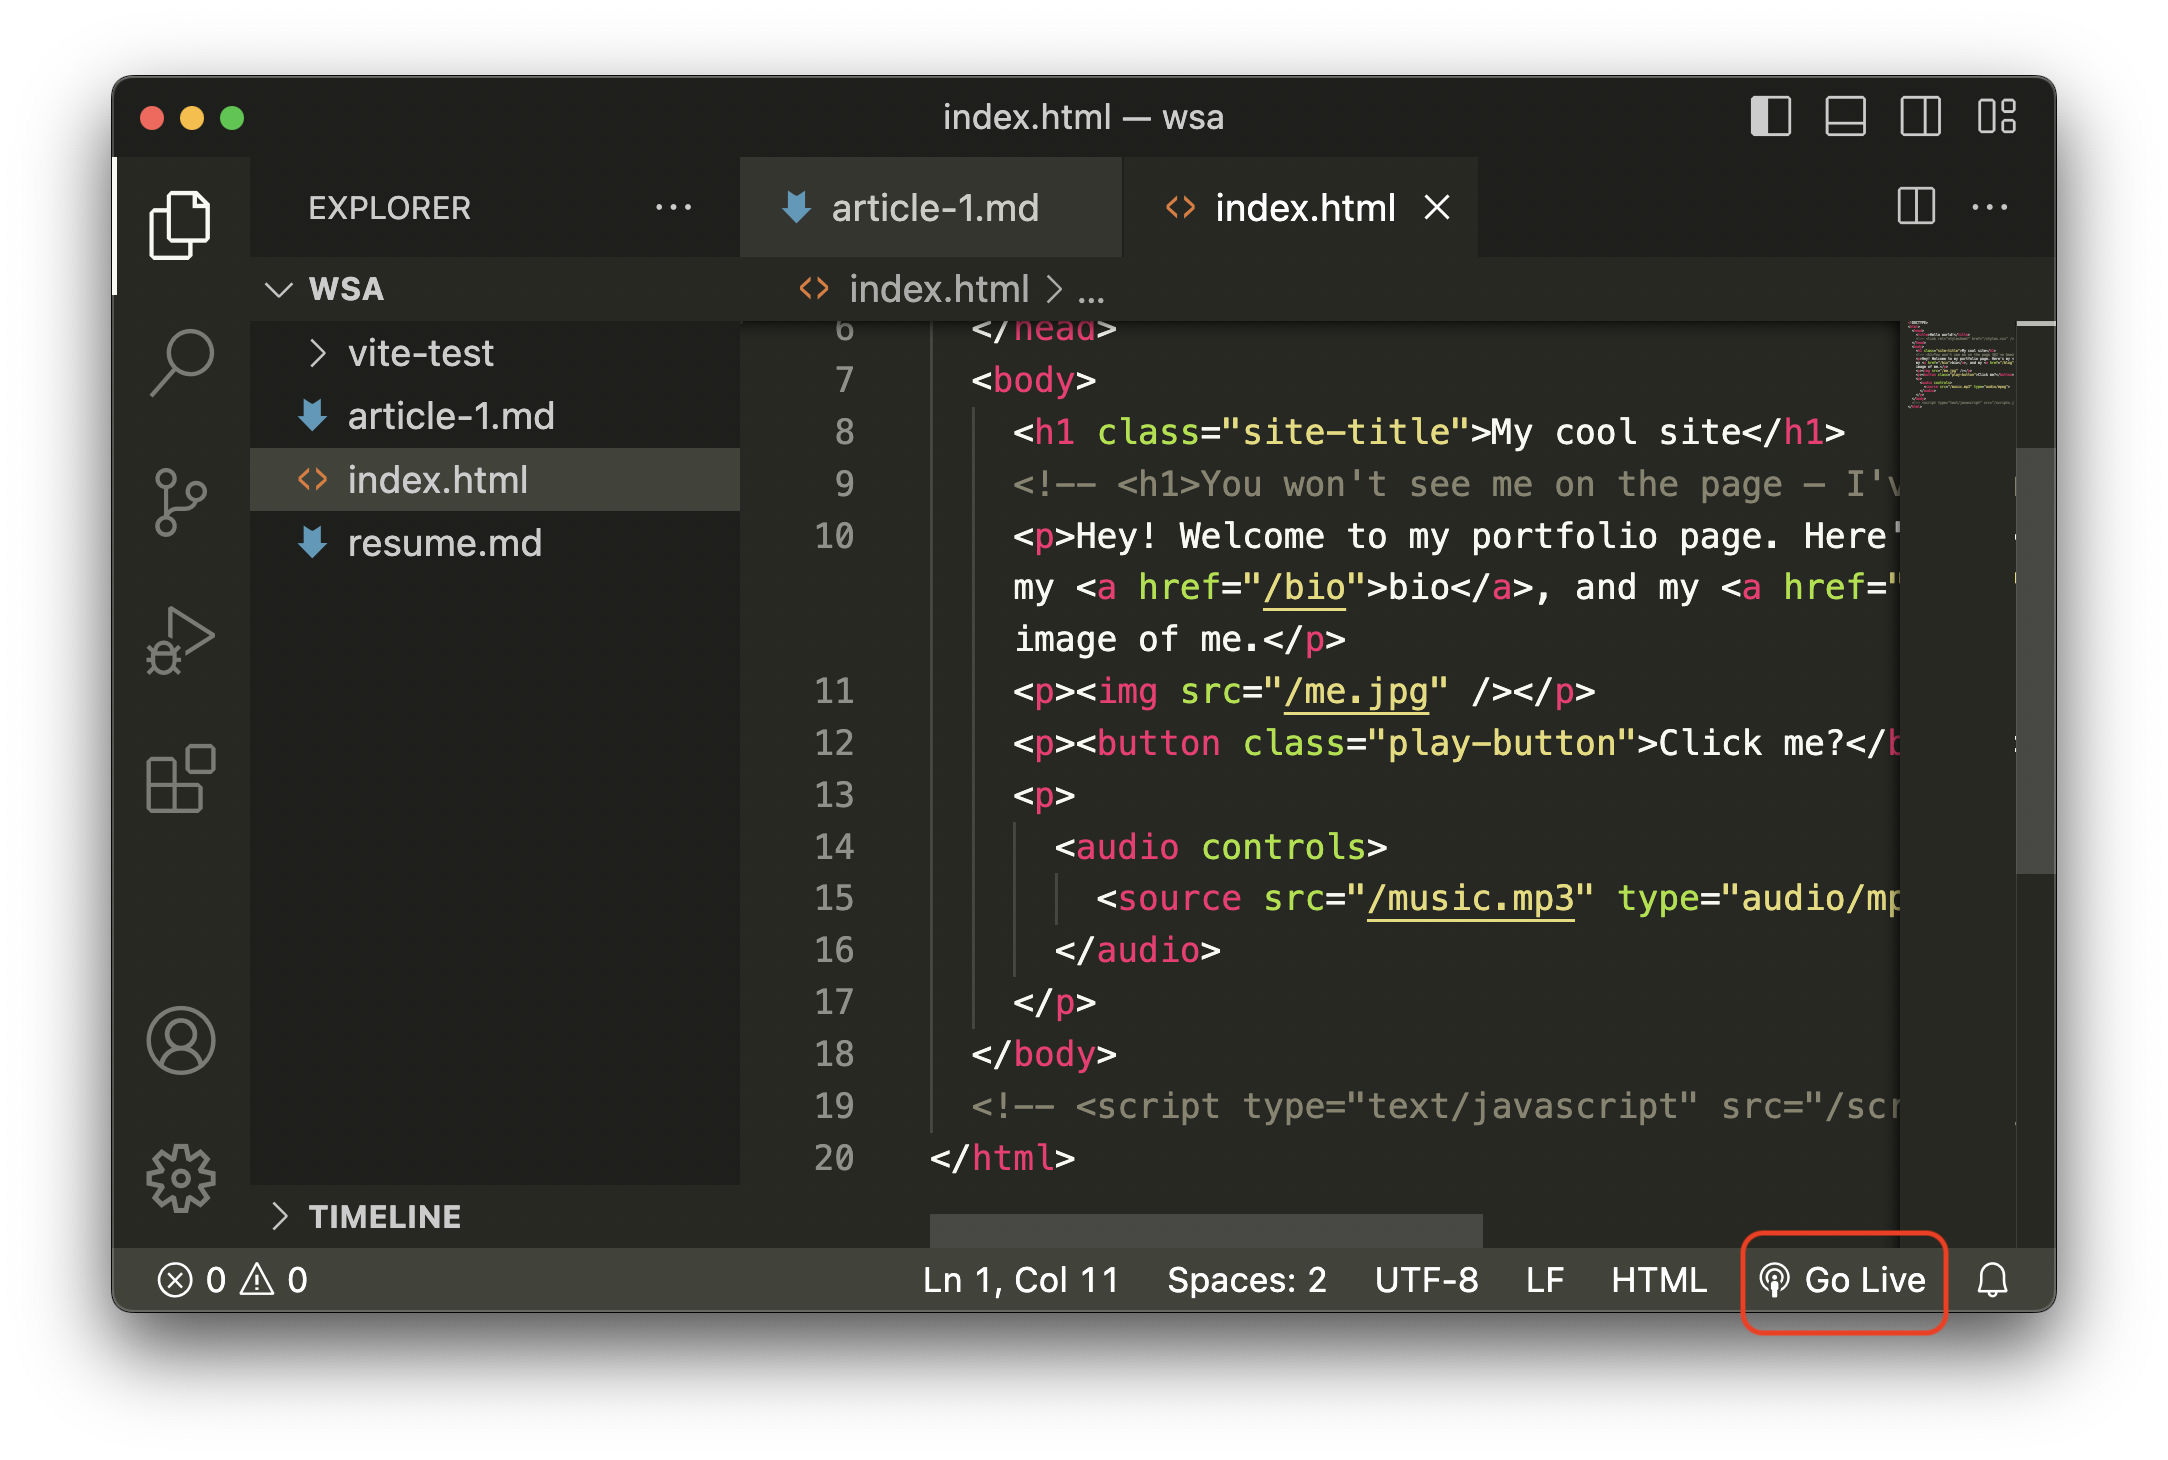
Install the Live
Server VS Code extension. The "Install" button on that page should open VS Code and install
the extension.
Once it's installed, press the "Go Live" button in the bottom right. It should open a new tab in
your browser at localhost:5500 ("localhost" is an alternative name for "127.0.0.1", if
you see the latter).
If you close the tab, you can always get back to the page by going to localhost:5500 in
your browser. You can tell which port (5500 in this case) to choose based on the text that replaces
"Go Live" in the bottom right.
Part Two: Languages
Now that we've got our tools together, I'll give an overview of the three main languages used on the web. These are HTML, CSS, and Javascript.
HTML: content
HTML stands for Hypertext Markup Language, and it defines the content of a page.
HTML
tags surround different types of content to differentiate paragraphs from lists, headers, images,
etc.
HTML tags all have a base appearance defined by your browser, but appearance isn't what we use HTML
for. It's best at defining content, and the structure of that content. What information are
we
trying to convey, and how can we best divide that information into logical sections?
Most tags have a start and end, such as <p>some text here</p>.
Tags also nest inside each other, such as having links inside of paragraphs (see the first
<p> below). Tags can also have attributes, which can specify source URLs for
images/audio, define identifying classes
for a given tag, and much more.
Comments are something you'll see a few different ways in different languages, and most code
editors will color comments differently than other text. Anything inside a comment is disabled, and
is useful for making notes to yourself or disabling particular sections of a document.
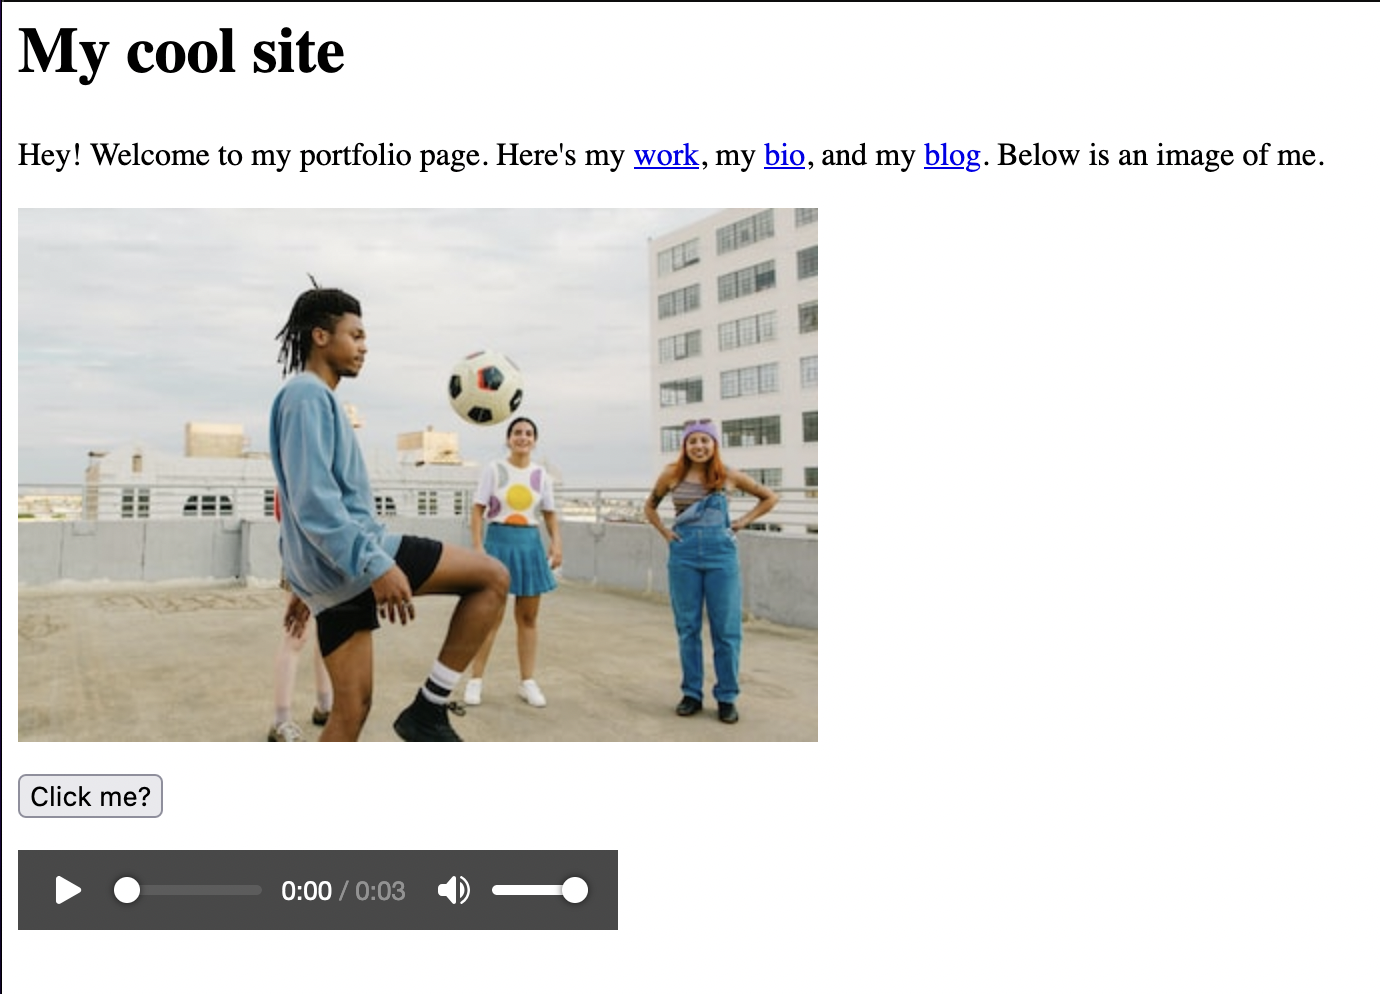
Replace the contents of your index.html file with the block below, save, start the
server, and see
what it looks like!
<!DOCTYPE>
<html>
<head>
<title>Hello world!</title>
<!-- <link rel="stylesheet" href="/style.css" /> -->
</head>
<body>
<h1 class="site-title">My cool site</h1>
<!-- <h1>You won't see me on the page – I've been commented!</h1> -->
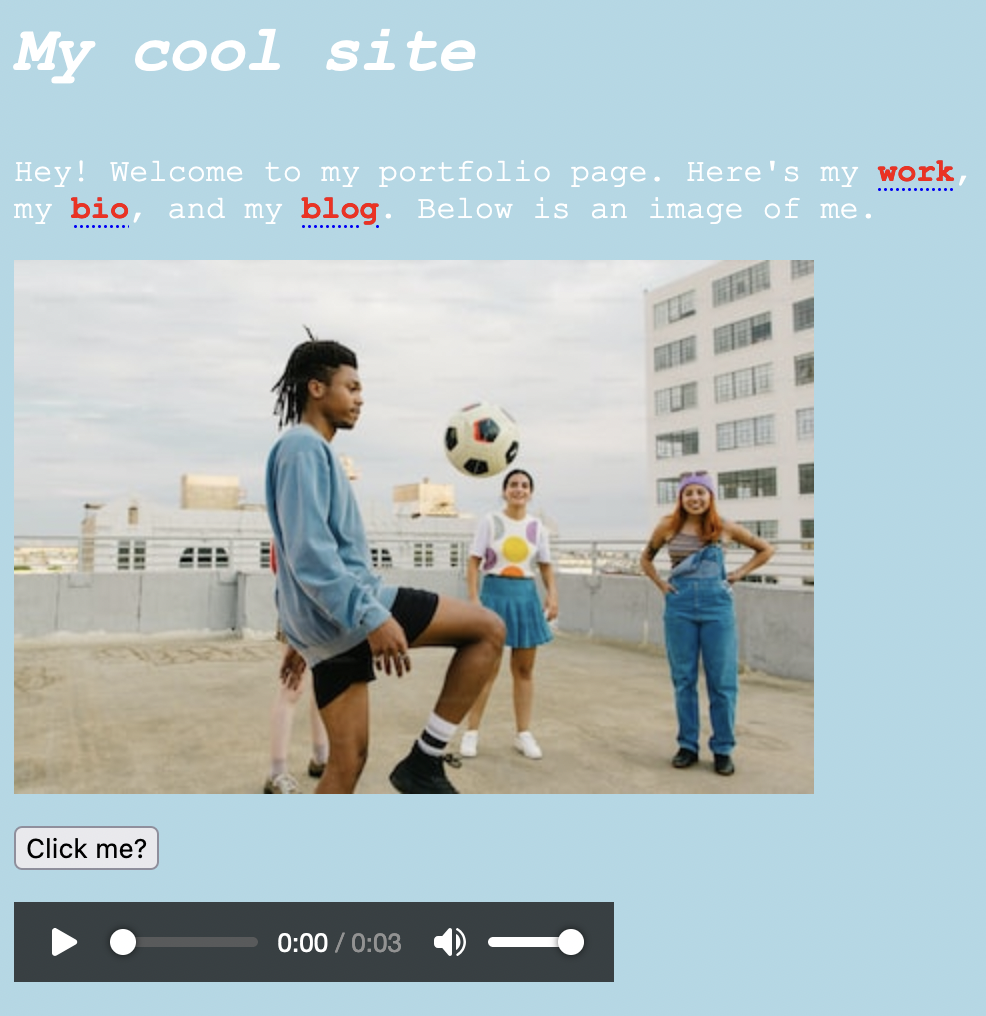
<p>Hey! Welcome to my portfolio page. Here's my <a href="/works">work</a>, my <a href="/bio">bio</a>, and my <a href="/blog">blog</a>. Below is an image of me.</p>
<p><img src="https://plus.unsplash.com/premium_photo-1666183669448-e41821d3ba2e?crop=entropy&cs=tinysrgb&fit=max&fm=jpg&ixid=M3wzMjM4NDZ8MHwxfHJhbmRvbXx8fHx8fHx8fDE2ODQzNDkxMzV8&ixlib=rb-4.0.3&q=80&w=400" /></p>
<p><button class="play-button">Click me?</button></p>
<p>
<audio controls>
<source src="https://tonejs.github.io/audio/loop/FWDL.mp3" type="audio/mpeg">
</audio>
</p>
</body>
<!-- <script src="/scripts.js" type="text/javascript"></script> -->
</html>
It should look like this:
Exercises
Here are some things to try, to get a better feel for HTML.
- There are six sizes of headers, from
h1toh6. Try switching out the site title to something else, and see what changes. How do you think you'd use these? (Remember to make the closing tag match the opening tag!) - None of the links in this page work right now, because their pages don't exist. Try changing
their
hrefattributes to something real. - Try right-clicking on this list (the one you're reading right now) and go to Inspect Element.
What elements make up the list items? What element is enclosing all of them? Try making your own
list at the end of the page, before the closing body tag (
</body>).
CSS: appearance
CSS stands for Cascading Style Sheets, and it defines the appearance (or "style) of
your content. CSS operates on the tags you defined in your HTML, and can get more specific based on
attributes of those tags.
CSS uses selectors to determine which elements to focus on, followed by a block that defines which
CSS rules should be applied to that element. It follows this format:
    selector {
        rule: value;
        rule: value;
    }
Make a new file in your folder, and call it
style.css. Copy the CSS below and paste it in. In index.html, click on the
commented line under the <title>
tag (with the <link> tag) and press Ctrl / (Windows/Linux) or
Cmd / (Mac) to uncomment the line. Save and refresh the page. What changes as
these styles are added?
    body {
        background: lightblue;
        color: white;
        font-family: "Courier New", monospace;
    }

    .site-title {
        font-style: italic;
        font-size: 2rem;
        margin-bottom: 2rem;
    }

    a:link, a:visited {
        color: red;
        font-weight: bold;
        text-decoration: underline dotted blue;
    }
It should look more or less like this:
You may be wondering what the selectors are, or what .site-title is. A CSS
selector lets you be as general or as specific if you like. Here are some basics:
- Any HTML tag can be selected by name. In this case, we have
body {...}, but we could have donep {...}orbutton {...}as well. - A CSS selector will apply its rules to every match. In this case, we only have
one
bodytag, but if we were to usep {...}, our changed styles would apply to every paragraph. - A tag's
classattribute is an important and common way of picking out specific elements, or specific groups of elements. You can select elements by class with a period, so.site-titlein our case. - Comma-separating a list of selectors will impact every one of them.
- A single element can be affected by a number of different CSS blocks. The last and most specific rules will always take priority.
Now, let's check the inspector. In the browser, the inspector lets you see the actual state of all your elements. Try right-clicking on any element, and go to "Inspect" or "Inspect element" in your browser. You should see a list of all the CSS rules affecting this element over on the right.
Exercises
- That text color is hard to read – there's an accessibility issue. In the inspector, find
the
bodytag. Change itscolorto something better – maybe blue? - Under
.site-title, try adding a new rule:letter-spacing. Set it to something like 5px and see what happens. - The
a:link, a:visitedselector is acting on two of the four states a link could be in (unvisited, visited, hovered, clicked). Try making a new one just fora:linkand give it a different color. Make sure some of the links are visited vs unvisited and see what's different!
JS: behavior
Javascript is a huge topic that the tutorials after this one will spend the most time on! If HTML is what the content is, and CSS is how that content appears, JS lets you explore what that content can do. Unlike the other two, Javascript is an actual programming language, that lets us do any of the following and more:
- Listen to the actions on the page: i.e., clicking buttons, hovering, scrolling
- Dynamically add/remove styles according to those inputs, or based on timers
- Create new content on the page
- Work with data
- Communicate with external services through APIs
- Leverage other JS libraries that make it easier to use 3D spaces, generative canvas animations, and: sound!
We'll do more interesting things with Javascript in a second, but let's test our setup first.
Make a new file in the same folder, called scripts.js, paste in the code below, and
save.
console.log("Hello world!");
console is an object the browser knows about, log is a method that
object knows how to
implement, and "Hello world!" is a parameter of that function. So
conversationally, this
line means: "hey console, can you run your log method, using this text I
have?"
In index.html, uncomment the
<script> line at the bottom. Now, let's go back to the Inspector. In the top menu,
you should see a tab called Console. The console is where all our Javascript "logs" will go,
as well as where any errors will display if we have them. If all is well, you should see the
line "Hello world!" in the console.
Basic example: Play button
Going into depth with Javascript would take more time than we have, but let's do something that'll give you a broad overview of working with Javascript: making a custom play/pause button.
1. Finding elements
First, let's get the two elements. In JS, the document object represents the
entire page, and we can use it to find (*query*) our elements using the CSS selectors we
just talked about. We'll save these two elements as variables so we can use them later.
Add this code below the console.log line in scripts.js.
    // hey document, can you use your querySelector method with this
    // CSS selector, and then store the resulting value in a variable
    // called "playButton"?

    const playButton = document.querySelector(".play-button");
    const audioElement = document.querySelector("audio");
2. Listening for clicks
Now, let's listen to the button. First, we'll test to make sure we're correctly finding the
button. Add this code to the bottom of scripts.js, save, and refresh the page.
When the page loads, nothing will happen. But every time you press the button, everything
between the curly braces (`{}`) will run. So, when you click the button, you should see
"clicked button!" line appear in the console.
    playButton.addEventListener("click", () => {
        console.log("clicked button!");
        });
3. Playing audio
The next part is pretty simple: when we click, let's play the audio file!
    playButton.addEventListener("click", () => {
        console.log("clicked button!");
        audioElement.play(); // add this line!
    });
You might wonder what would happen if we tried calling play() on something that's not an
audio file. Well: try it! Replace audioElement.play() with
playButton.play() and see
what happens.
(If you get a confusing error, great! A button doesn't have a play method, and it doesn't
know anything about audio.)
3.5. Playing and pausing audio
What happens if you press the button more than once? Well, nothing. Let's make it so our button switches between playing and pausing.
    let state = false; // add this line above the listener

    playButton.addEventListener("click", () => {
    // replace the two lines you had before with these:
    if (state == false) {
        audioElement.play();
        state = true;
    }
    else {
        audioElement.pause();
        state = false;
    }
    });
So now, we have a new variable, state. When we click, if state is set to
false, we'll pause the audio and switch state to true. If state is true, we'll pause
the audio and switch state to false.
4. Changing button text
Finally, let's change the text of our button to show what the button will do the next time it's pressed.
    playButton.addEventListener("click", () => {
        if (state == false) {
            // ... earlier code ...
            playButton.innerText = "Pause"; // add me!
        }
        else {
            // ... earlier code ...
            playButton.innerText = "Play"; // add me!
        }
    });
Exercises
Here are some things to try with Javascript. It's worth noting that Javascript is the least kind about syntax errors – if you have grammar errors, it'll stop and refuse to run anything else unless you refresh the page. That's okay – VS Code is pretty good about showing you where the errors might be.
- We can query for elements other than the button and the audio. Try and see if you can make
something happen when you click on the
img. - You can log anything, including variables. Try doing
console.log(state);right after the first curly brace. - ...and when I say variables, the
playButtonandaudioElementvariables are included, too. Try doingconsole.log(playButton);and see what you get!
4.5 Hiding the audio
Finally, we can hide the original <audio> element from view, so that the only way
to play or pause
the audio is through our button. (It's still part of the HTML, just hidden from the user!) We'll
also style the button a little. Paste the CSS below at the bottom of style.css.
    audio {
        display: none;
    }

    .play-button {
        background: blue;
        border: 1px dashed white;
        color: white;
        font-family: monospace;
        padding: 1em;
        text-transform: uppercase;
    }
There you have it! Below is a working version of this code, for reference.
See the Pen WSA Tutorial #1: end result by RL (@tinstar) on CodePen.
More resources
There are a ton of resources online for learning web development. Here are a few:
- w3schools' HTML tutorial
- Mozilla's HTML basics
- Mozilla's CSS basics
- Mozilla's Javascript basics
- A11Y's Web Accessibility checklist. The internet is a huge communication medium, and accessibility is extremely important!
To Top ↑